There are three pillars that matter in project management, task management, time management and team management. A good project manager should always have the latest and greatest truth about who is working on what and for how long. In the other hand, a good project management tool should help answer these questions in a simple and effective way. There are numerous project management tools out there, a good part of these tools are utterly complicated! It took me more than a minute to add a simple task to my project. Other tools are too simple. Some of these simple tools have things like due dates on tasks which is not good enough as I can’t get a clear answer on what is left to do on my various projects. After some time wondering around looking for a tool that fits my needs, I decided to go on and write a tool that will suite me best. So I came up with the Online Task Manager which I am using to organize my everyday work and other various projects I have. The tool can be found at https://www.online-task-manager.com
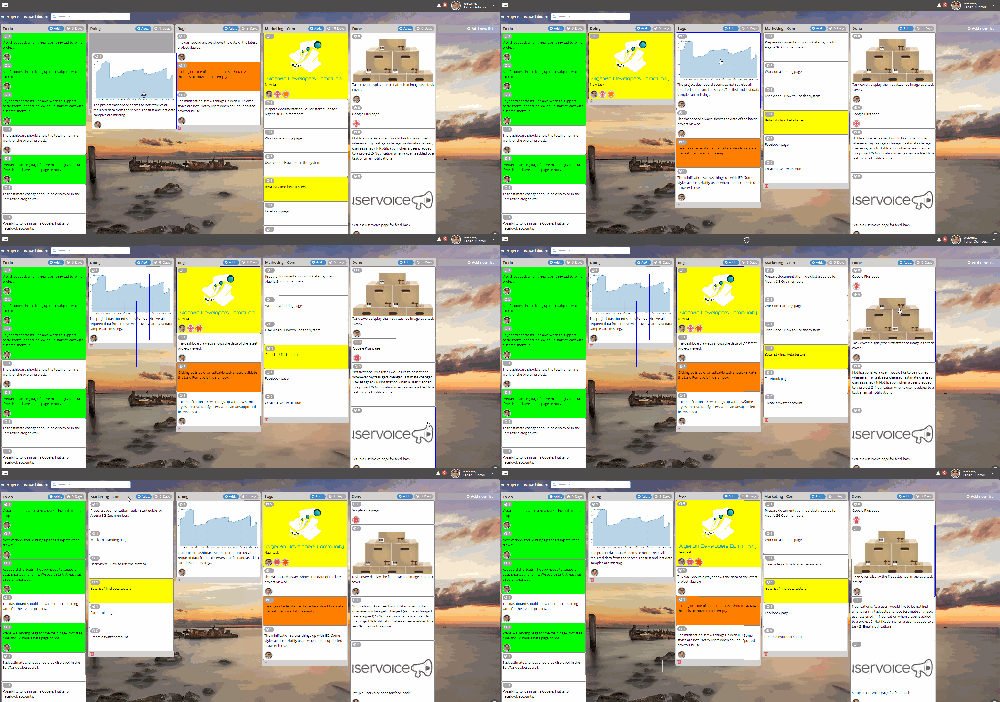
Online Task Manager organizes your tasks into Projects. Every project is board that contains lists. Every list is a set of tasks. You can have as many lists as you wish. Every list contains as many tasks as you want. Tasks can be dragged from one list to the other.
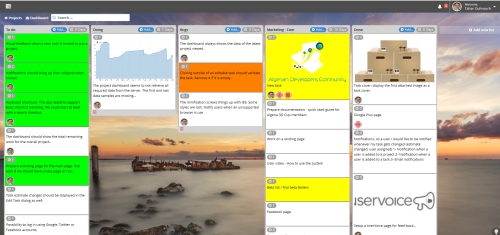
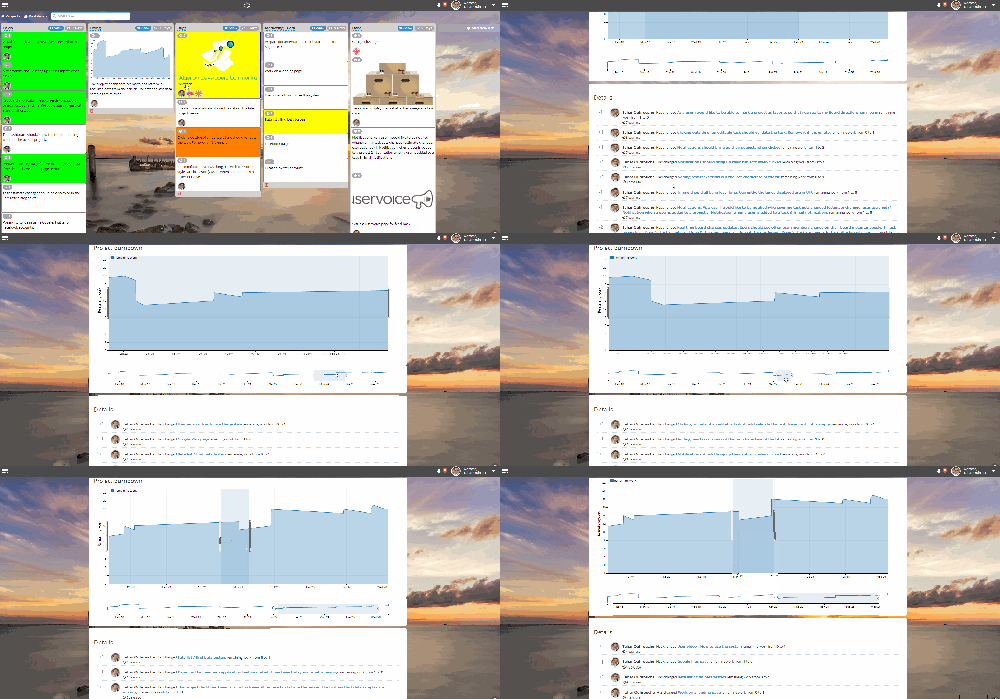
You first need to register into the system. Once in, you will be directed into your main work area as shown in the picture above.
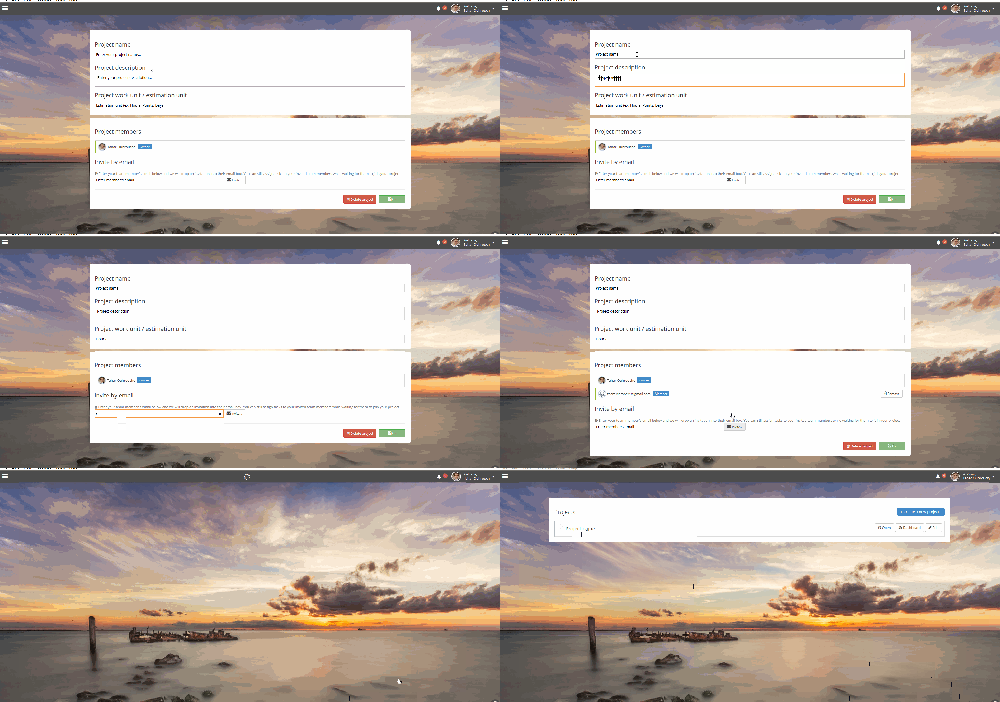
Start by creating a new project, enter your project main information such as a title, a description and how would you like to track your time spent on this project. Work measurement can be days, hours, weeks, months or anything else that can represented as a number. At the bottom of the page, the system gives you the ability to add new team members into your project. The system is smart enough to look at your other projects and propose to add team mates you have on other project into the current one. You can always invite new team members via email, just enter their email and we will take care of the rest. Added members will be added to your project and can be assigned tasks straight away. Even before they register into the system.
Once your project is created, click on  to open the project board. There are three lists that we create for you by default, “To do“, “Doing” and “Done” you are free to rename these lists to anything you want. We also offer you a possibility of adding a new lists at your will.
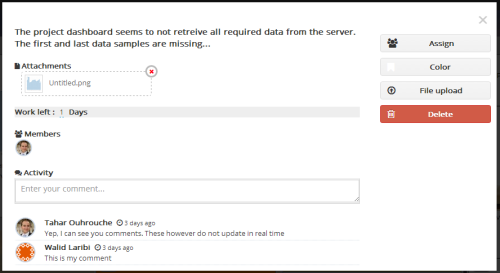
To edit a task, click on it, the following dialog will pop up.
This dialog allows you to:
- Change a task title
- Change a task color
- Assign new team members
- Attach files
The board also offers a powerful instant search. Enter any text into the search box and all tasks will be filtered instantaneously.
Note that changes made on your project will be automatically reflected on all your colleagues computers, the changes propagate instantaneously.
Online Task Manager also gives your the ability to view your project’s timing measurements. As mentioned earlier, every project has an estimation / work unit which can be days, hours, weeks, months or anything else that can represented as a number. Every task has an estimate. Tasks and task lists display their remaining work efforts, this gives you plenty of possibilities as to measuring how much work is left in every category
To view your project dashboard, click on the Dashboard button at the top of your board. This will bring up a graph showing effort spent up to the current date. You can filter out the graph and see who changed what and how.
Note that Online Task Manager is now in a beta phase, we would be more than happy to have you give us a try and let us know what you think and how we can change our system to fit your needs.
